Cinema-Quality Sound for Small Media Rooms
Last updated November 12, 2026 · By Brandon Dixon

The room is why your movies don't sound like a theater. Not the receiver, and not the badge on the speakers. A small room bounces sound off every surface until bass booms in one seat and vanishes in the next, and dialogue arrives smeared. The fixes are mostly cheap. Measure what the room is doing, put thick absorption at the first reflection points, trap the corners, place the sub where the room wants it, and verify the result with your ears and a sweep.
I moved my couch eight inches once and the dialogue suddenly popped. That is the kind of change this guide is after. It walks the whole loop in order, with common materials and a budget to match, from the first measurement to knowing when to stop.
Key insights
- Run the mirror test first: sit in the main seat and mark every spot where a wall mirror shows you a speaker.
- Thick beats thin: four inch panels at the first reflection points do more than foam on every wall.
- Place the sub with a crawl, set the crossover near 80 Hz, and leave EQ for last.
- DIY panels run roughly $15 to $30 each in materials at 2026 prices, well under commercial panels.
- Stop when the big peaks are tamed and dialogue is clear in every seat.
Why your room is part of the sound system
Speakers and a receiver make sound. The room decides what reaches your ears. In a small space every wall, the ceiling and the floor are close enough to throw reflections back into the listening seat, and low frequencies suffer most. In a typical small room, sound below around 300 Hz is dominated by the room rather than the speaker. Above that line the relationship flips, which is why bass and dialogue need different fixes. If you want the physics behind that line, the Audioholics guide to small room acoustics covers it in depth.
Three things go wrong in a small room. Boundary reflections from the side walls and ceiling arrive just behind the direct sound and smear dialogue. Standing waves between parallel surfaces pile bass up in some seats and cancel it in others. And because the dimensions are short, those resonances land right in the music and effects, where you hear them plainly.
That is why a cheap treatment in the right spot beats a slightly better receiver. A receiver upgrade plays the room's problems back with more detail. Panels at the first reflection points and traps in the corners attack the problems directly. Chasing louder never fixes a room problem. It just funds it.
Find out what your room is actually doing wrong
The diagnosis needs almost no money. Get an omnidirectional measurement mic and free sweep software such as Room EQ Wizard, which runs a sine sweep and shows frequency response, waterfall plots and decay time. A phone mic is fine for rough clues, but it is unreliable at low frequencies, and low frequencies are where a small room misbehaves. Before measuring, put the speakers and the seat where they will actually live, shut off the AC and anything else that hums, and set levels so the sweep does not clip.
Run a baseline sweep with the mic at seated ear height in the main seat. Then move the mic a little left, right, forward and back and sweep again. What changes tells you which problem you have. If the response shifts sharply over a few inches, that is a narrow null, and moving the seat or the sub later will do more than any panel. If the whole listening area shows the same hump or sag, that is a room-wide problem, and treatment is the answer. A final sweep near each speaker rules out a driver or placement fault before you blame the room.
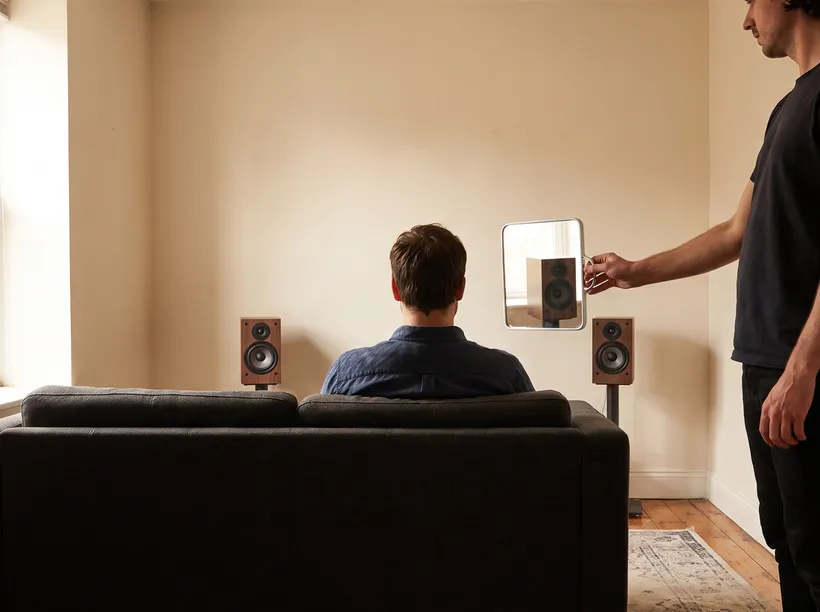
The mirror test finds the reflection points with no gear at all. Have a friend sit in the main seat while you slide a mirror flat along the side wall. Everywhere the listener can see a speaker in the mirror is a first-reflection point. Mark both side walls and the ceiling above the seat. Those marks are where the absorption goes. If no mirror is handy, clap once at the listening position and listen for a fast zing between the walls. That flutter echo points to the same spots in a rougher way.
Treat reflections without deadening the room
The marked points get the thick panels. The rest of the wall stays alone. The order matters, because the most common DIY mistake is the opposite one: covering every surface in thin foam until the room goes dead and dialogue sounds worse than before.
Build panels that actually absorb
A useful panel is a wooden frame, dense insulation, and fabric that lets air pass. Nothing exotic.
Tools
- Staple gun
- Saw
- Straightedge or square
- Tape measure
- Utility knife
- Work gloves
- Dust mask
Materials
- Mineral wool or rigid fiberglass batts
- 1x3 or 1x4 lumber for the frames
- Breathable fabric
- Screws
- Hanging hardware, such as French cleats, keyhole hangers or D-rings
Build to a standard 24 by 48 inch panel, which matches insulation board dimensions and wastes very little material. Assemble the frame and check it for square by measuring both diagonals, which should match. Cut the insulation slightly oversize so it fits into the frame under light compression. Wear the gloves and dust mask while cutting mineral wool or fiberglass. The fibers shed and irritate skin and lungs, and sweeping them off the garage floor afterward is worse than the cutting was.
Staple the fabric from the center of each side and work outward so the face stays flat, folding the corners hospital-style. Before a whole roll of fabric gets committed, check that it breathes. Press the cloth to your mouth and blow. If air passes through, sound will too. Vinyl and tight weaves block the panel and leave you with wall decoration.
Thickness is a decision, not a detail. Two inch panels help the highs. Four inches reach the midrange where dialogue lives. Six inches start touching the lower mids. Leave a one to three inch air gap between the panel and the wall, which extends the absorption downward without buying thicker material. Thin one inch foam treats only the tweeter range, which is how rooms end up sounding dull and still muddy.
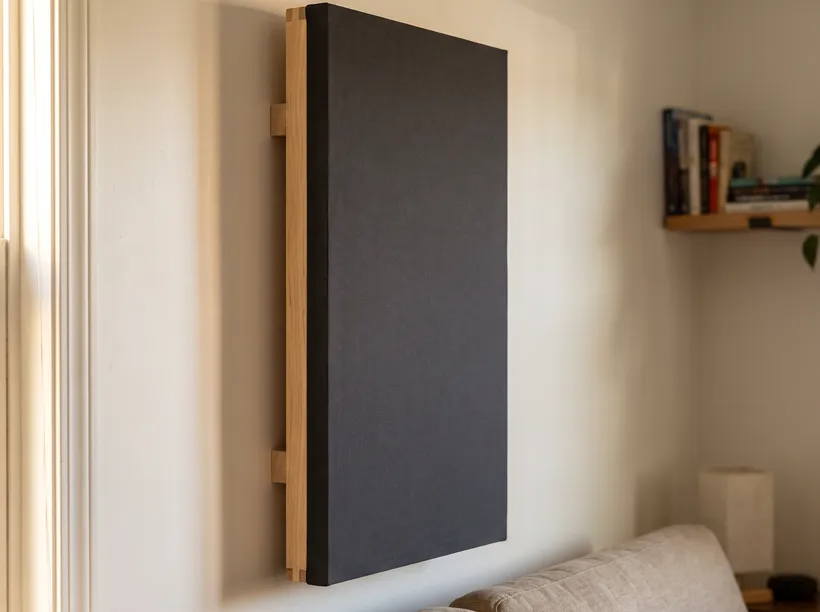
Hang the finished panels at the mirror-test marks, held that one to three inches off the wall. If you want a photographed walkthrough to follow alongside this recipe, the SoundproofHQ guide to making DIY acoustic panels walks through the same build.
Keep the room alive with diffusion
Absorption is not the only tool, and more is not better. Once the first-reflection points are treated thickly, stop adding absorbers. Some lateral reflection preserves a sense of space, and a room with absorption on every surface sounds small and dead rather than controlled.
The rear wall behind the listening position is the natural home for diffusion, because it breaks up reflections and keeps the room lively without boosting echoes. Side walls behind the seating come second. Ceiling diffusion only earns its space in a room large enough to have ceiling to spare.
Diffusion can cost nothing. A bookshelf filled with books, records and boxes at varied depths scatters reflections and looks like it belongs in the room. If woodworking is the hobby, varied depth blocks of scrap wood glued to a panel do the same job. The rug, thick curtains, and the couch itself are the free absorption tier, and they count.
Bass: traps first, then the sub
Bass is the small-room problem. The waves are long, they bounce between parallel surfaces, and they pile up or cancel depending on where you sit. Traps and sub placement attack it from both ends.
Find and trap the boom
Room modes explain the boom. The fundamental frequency along any room dimension is the speed of sound divided by twice that dimension. With sound moving at about 343 meters per second, a room 4 meters long has its first lengthwise resonance near 43 Hz. Every dimension produces a series of these, and a deep null at one specific note usually means the seat is sitting in the gap between two of them. Moving the listener or the speakers by tens of centimeters shifts where the nodes fall, which is why small moves cure deep dips.
Trap placement has a clear priority. Start with the front corners near the speakers, then the two rear corners behind the seat, running them floor to ceiling when possible. Bass collects in corners and along the wall-ceiling junctions, so treat those too if the room allows. Use thick, dense porous traps, four to six inches of mineral wool at minimum, because thin traps barely reach the lowest frequencies. Tuned membrane or slot traps can target one stubborn frequency, but they are a measurement-driven project for after the corners are handled.
Place and integrate the sub
Sort the mains first, because the sub has to blend with them. Set the left and right speakers and the main seat in an equilateral triangle, aim the tweeters at seated ear height, and start with the speakers pointed straight ahead. Rotate them slightly toward the seat until the center image locks in. Pull them out from the front wall if you can, since wall proximity piles up bass unpredictably.
Then find the sub's spot with the crawl. Put the sub at the listening position, play a bass-heavy track on repeat, and crawl the room until the bass sounds fullest and most even. That spot is where the sub belongs. Corner placement gives maximum output but usually adds boom, so if the corners sound bloated, work along the front wall or to a mid-wall position.
Integration comes after placement. Start the crossover near 80 Hz, or about an octave above where the mains start to roll off. Flip the sub's phase between 0 and 180 degrees and keep whichever setting gives fuller, tighter bass. Use the receiver's distance or delay setting to line the sub up with the mains.
If big corner traps are not realistic for the room or the budget, two well-placed subs are the genuine alternative. Two subs smooth the modal peaks and even out the difference between seats. What they and EQ cannot fix is a null, because nulls are location-dependent, and no filter fills a hole where the room itself cancels the sound.
What it costs, and what changes in an apartment or finished room
The material bill is the reassuring part. A DIY panel built from mineral wool, 1x4 lumber and breathable fabric runs roughly $15 to $30 per 24 by 48 inch panel in materials, against roughly $60 to $150 for a commercial panel. A four-panel starter set lands under about $100 in materials. Those are rough ranges observed in 2026, and lumber and insulation prices move, so treat them as a budget shape rather than a quote. The gap is still the reason the whole plan is worth building yourself.
Where the room sits in the building changes the plan, not the goal. The quick wins that suit an apartment or a shared wall: a rug on a bare floor, thick curtains, bookshelf diffusion, panels on the reflection points facing the shared wall, and isolation pads or a small platform under the sub so less of the explosion scene travels through the floor. The pads and the rug are an evening's work, and they reduce what reaches the structure through the sub itself. They do not fix a floor that flexes. Insulating or decoupling a floor is renovation-scale work, and nobody should start it expecting a fast fix.
The finished-room worry has a short answer. Everything in this guide, from the mirror test to the traps to the sub crawl, works without opening a wall. Placement and surface-mounted treatment carry most of the improvement. The room never has to know it was not built for this.
The final loop, and when to stop
The loop is always the same, and it runs in this order.
- Run a baseline sweep and note the big peaks and dips.
- Hang panels at the mirror-test marks.
- Add corner traps, front corners first, then rear, and re-measure.
- Crawl the sub into place and set the crossover and phase.
- Move the seat and speakers in small steps, starting from the rule of thirds, which puts the listening position one third of the way into the room, then sweep forward and back until the bass evens out.
- Re-measure and compare against the baseline, and go after the biggest remaining problem.
- Use EQ last, and only for narrow remaining spikes. Nulls get furniture moves, not filters.
- Listen to familiar tracks at moderate volume and let the ears make the final call.
For anyone who wants a number, a midband decay time around 0.3 to 0.5 seconds is a common goal for small rooms. It is guidance, not a standard, and a room that measures close and sounds clear is finished.
Know when to stop. When the big peaks are tamed, dialogue is clear in every seat, and the remaining dips respond only to moving furniture, the room is done. Small rooms keep some modal quirks no matter what, and the last ten percent is not worth the time it charges.
If the room has not been touched yet, tonight's version takes fifteen minutes. Run the mirror test and one measurement. This weekend, build one panel. The first sweep will show where the money should go.