How to Turn a Shed Into a Man Cave: Power, Insulation and Layout
Published on November 12, 2026 · By Brandon Dixon

For a shed with a sound floor, a dry roof and a frame that does not wander, turning it into a man cave is less a construction problem than a sequencing problem. The order that works: walkaround checks and permits first, then real power, then sealing and insulation, then heating and cooling, then the floor, then the furniture. Each phase earns its place. Comfort spending is wasted in a shell that cannot hold temperature, and the wiring and internet decisions are cheapest while the walls are open and the trench to the house is dug exactly once. The rest of this article walks that order, with the checks that tell you when to stop and hire.
Key insights
- Run the walkaround checks and ask the building department and HOA before spending a dollar.
- Retire the extension cord: a hangout needs a dedicated circuit, and the wiring is electrician territory.
- Seal the air leaks and insulate before buying heat, electronics, or furniture.
- Never run an unvented fuel-burning heater in a small sealed shed.
- Test the floor for moisture and measure seated eye level before the couch and screen go in.
Is your shed a candidate, and what do you clear first?
The walkaround checks
Walk the shed twice, once with the lights on and once with them off, and you can judge every item that decides this project in about ten minutes. No tools yet. The point is to find the things that kill the job before money moves.
Footprint first, and honestly. Whether the space works depends on what you are putting in it, so pace the real arrangement: couch, screen, game table, and room to walk between them. A shed that fits the couch and the screen and nothing else is a two-seat listening room, which is a fine outcome if that is the plan and a disappointment if it is not.
Floor next, because a bad floor is expensive to ignore and worse to discover late. Soft spots underfoot, a slope you notice while walking, or a history of standing water all mean the same thing: the floor gets solved before anything sits on it. The moisture check in the flooring section below stops being optional the moment a floor shows any of these.
Roof and frame together. Water stains on the ceiling or high on the walls, daylight through the panels, or a wall you can push out of square are repair work, not decorating. A sound roof, a straight frame and a dry interior are what make everything after this section worth pricing.
Height, both standing and seated. Stand up straight in the middle of the shed. Then sit where the couch goes and see whether the room still feels like a room. A ceiling you brush with your head changes every layout decision that follows, from screen height to light fixtures.
Door placement, because it decides more than it looks like it does. The door swing, the couch, the heater and the main walking route all compete for the same floor, and the door is already installed. Swing it fully open now and mark the arc, before you fall for a layout the door forbids.
Distance from the house is the final check, and it prices the next section. Power and internet have to cross that yard somehow, and the cost of the crossing belongs in the project budget whether or not it appears on an insulation receipt.
Permits, HOA, and the building department
Two changes usually pull a shed conversion into permit territory: new electrical circuits, and turning storage space into something the code world counts as habitable. Those are categories, not thresholds, and the local building department owns the actual answer for your address. A phone call before you spend anything is the cheapest line item in this entire project.
Ask what triggers a permit for your situation, which inspections would apply, and what the consequences are if the work goes in without one. Unpermitted wiring is not only a safety question. It can complicate a future home sale, and it skips the inspections that exist to catch the mistakes nobody in the room can see.
The HOA question is a property-document question, not a code question. Read the covenants for rules on outbuildings, exterior changes and what counts as a habitable structure, and check setback requirements while the document is open. A conversion the county allows and the covenants forbid is still a conversion you do not get to build.
Getting real power and internet out there
What a hangout actually draws
Name the working set: a TV, a gaming setup, a mini-fridge and, in winter, a heater. Nothing exotic, and that is exactly the point. That set is what an extension cord from the house was never built to carry, and every failure mode it produces is a room consequence.
The cord crossing the yard is a trip hazard for everyone who walks it in the dark, including you, carrying snacks. Long runs waste voltage, and electronics notice even when the cord looks fine. The house circuit feeding it quits when something else on that circuit kicks on, and it will pick the middle of game night to do it. And the lights end up on the same cord as everything else, which is how the room goes dark exactly once per evening.
The dedicated circuit, and where DIY stops
For a room that runs gear and heat, the honest answer is a new dedicated circuit from the house panel, run by a licensed electrician. That is the whole boundary and it does not bend: everything past plugging something into an existing outlet is electrician work. Not because you could not watch a video about it, but because the rules that govern the job are local and specific, the mistakes stay invisible until they matter, and this is the one phase of the project where the answer is usually a hire.
What you bring the electrician is the load list, not a wiring plan. Say what the room runs, heater included, and where the panel sits relative to the shed. That same conversation settles the route: power to a detached shed usually means a buried run, the burial details are the electrician's and the code's to specify, and the trench is open exactly once. Hold that fact for the next part.
Internet: decide before the trench closes
Work down the list and stop at the first option that works, because the cheap ones are genuinely cheap. First, test whether house Wi-Fi actually reaches: run a game or a stream out there with the door shut, not a speed test taken standing in the doorway. If it holds, you are done.
If it does not, the next rung is a Wi-Fi extender or mesh node near the shed-facing wall of the house. Beyond that, powerline adapters or adapters that use existing coax carry signal through walls Wi-Fi will not cross. Which rung works depends on the distance, what the shed walls are made of, and what the room is for. A room used for competitive gaming judges its connection harder than one where a show buffering for ten seconds costs nothing.
The last option is burying Ethernet in the same trench as the power run. It is the most reliable connection available and the only one that gets cheaper by being decided now. Even if Wi-Fi wins the test, ask the electrician what pulling a spare conduit costs while the trench is open. The answer is almost always less than reopening the yard in two years.
Sealing and insulating the shell
Seal first: the daylight test
Start with the cheapest test in the project. On a dark evening, shut the door, turn the lights off inside, and look around the door and window frames. Any daylight you can see is air moving through, in both directions, all year.
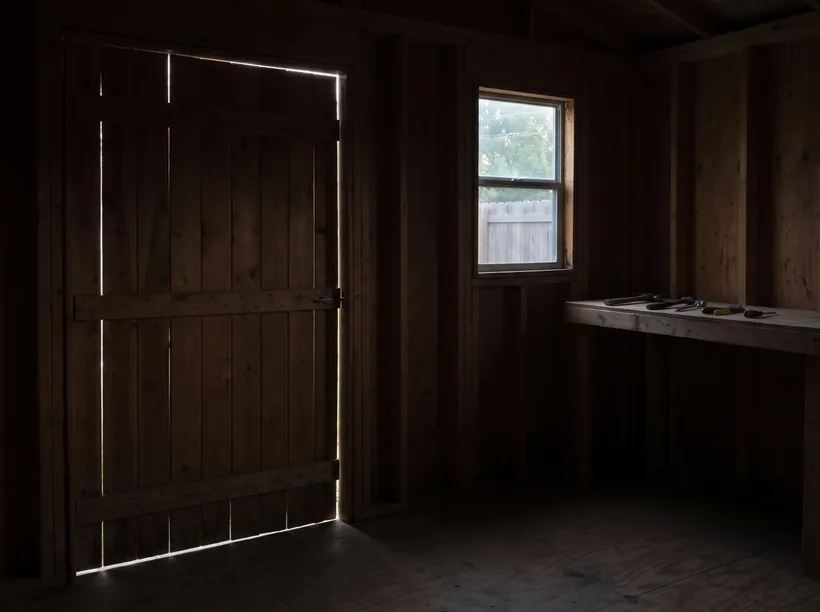
Factory sheds ship with almost nothing between the studs and the weather, and the big losses sit at the openings, not in the middle of the walls. Sealing those gaps before buying insulation is not a formality. Insulation over a leak is money spent warming the yard.
Then walk the rest of the shell the same way: corners, the line where walls meet the floor, anywhere two pieces of the building meet. Weatherstripping the door and a bead of sealant around the frames are small jobs that show their result the first cold night.
Insulation at decision level
The realistic do-it-yourself package for a shed is two layers doing different jobs. Batts between the studs fill the wall cavities, and they are the cheap, forgiving part of the job. A layer of rigid foam board inside that, with the joints sealed, puts a break over the studs themselves and covers the gaps the batts cannot reach. Neither layer needs to be the best product on the market. The point is a shell that stops leaking money in both directions, January and July.
The ceiling deserves the same treatment as the walls, because heat leaves through it eagerly in winter and pours back in through it in summer. The floor is its own question, and it gets its own section below.
Wall finish: drywall vs. plywood
Drywall gives the finished-room look, and it is what most people picture when they picture a room. It also wants taping and mudding, which is a skill, and a dusty week, which is a fact.
Plywood skips all of that. It goes up solo, takes screws anywhere, and gives shelves, mounts and the screen wall something solid to hang from. The tradeoff is a more utilitarian look, which in a shed man cave reads as a style rather than a compromise.
Two short observations belong here because they are about the shell, not the furniture. Security: shed door hardware is built to keep rakes in, not consoles, and a room that holds gear overnight should get the door, the hasp and the lock treated as real equipment. Window coverings are part of the same job, so the inside of the room is not advertised to the yard. Noise: thin walls work in both directions, so sound from the room reaches the patio at midnight and the street reaches your movie. Insulation helps both ways.
Heating and cooling a small outbuilding
A short list covers the realistic options, and the right one depends on your climate, your budget and how cold January actually gets where you live.
A window or through-wall heat pump unit heats and cools from one box. The through-wall trick matters in a shed short on window space: the unit mounts through the wall instead of sitting in a window that may not exist where you want it. A mini-split is the step up within that category, quieter inside and permanently mounted, and it wants a professional install, which puts it at the other end of the budget from everything else in this article. Which of the two fits is your call, made with your weather and your wallet. No universal winner exists here.
Resistive electric heat, the plug-in space heater, is the honest budget entry and the most expensive heat to run. It is also load, and this is where the power section pays off: a heater plus a TV plus a fridge is real load on whatever circuit feeds the shed, which is why the power decision comes before the heater decision and not after.
One category refuses itself. No unvented fuel-burning heater, propane, kerosene, or wood without proper venting, in a small sealed room. Combustion in a tight space produces carbon monoxide and pumps moisture into the air, and a shed is exactly the small sealed room that rule is written about. Electric or heat-pump heat only.
The floor: check it before you cover it
First, know which floor you have, because the checks differ. A slab-on-grade shed puts a cold, sometimes damp, piece of ground under the room. A wood-floored shed puts boards over a crawl space, which fails differently.
On a slab, run the plastic-sheet check. Tape a square of plastic sheeting flat to the concrete, seal the edges, wait a day or two, then look underneath. Condensation on the underside of the plastic or darkening of the concrete means moisture is moving through the slab, and that gets solved before any flooring goes down. Treat it as a practical screen, not a certified measurement, but respect what it catches. A slab that stays damp is a stop condition, not a flooring challenge.
On a wood floor, probe for soft spots, especially near the edges and the door, and sniff for must. Soft spots get repaired, musty air under the boards gets dried out or ventilated, and both jobs are cheap now and annoying later.
This section exists because of the do-it-twice mistake: carpet laid over a damp slab, enjoyed briefly, then smelled forever. Whatever flooring you choose, rank it by what it survives, because an outbuilding floor runs cold, takes tracked-in weather at the door, and will get a drink spilled on it eventually. Hard surfaces forgive all three. Anything soft and absorbent needs the moisture question answered first, not hoped away.
Laying out the room you'll actually use
Walk through one hypothetical shed to see the method, a single rectangle with the door on one short end, laid out for watching games plus a table for gaming. Nothing in the example is a recommendation. The point is the order of the decisions.
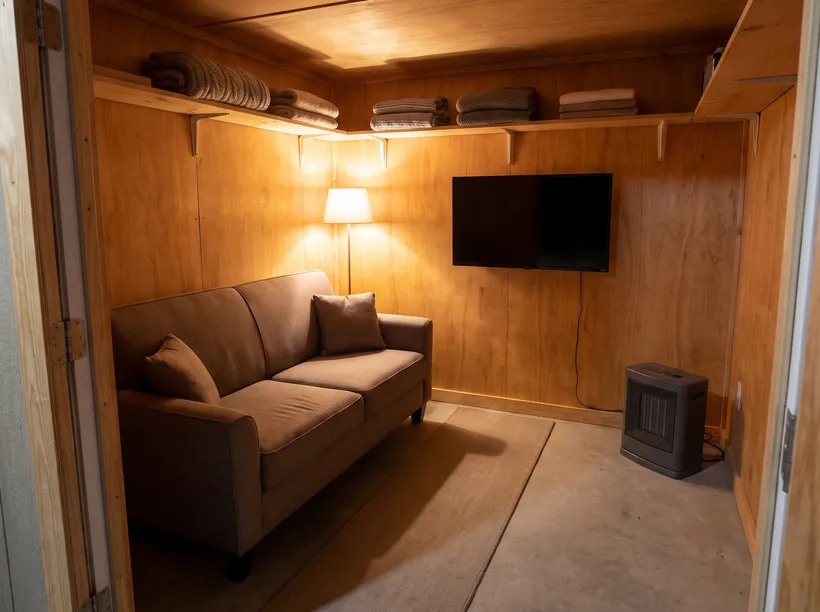
Start at the couch, not the wall. Sit where the couch goes and hold a tape, or a cardboard cutout the size of the screen, at seated eye level. That sightline decides the screen wall, and it prevents the classic error of a room designed for standing people. Seating distance follows from the screen size you will actually use, and the tape check settles both before anything is bought.
Draw the rest on the same sketch. The door swing takes its arc, and the couch does not get to live inside it. The heater takes its clearance, which puts it on the sketch before the seating, not after. Cord routes go in too, from the new circuit to each spot that needs power, because a beautiful arrangement with a cord crossing the walkway has quietly reintroduced the problem the circuit was hired to solve. Storage goes up on the walls, where it costs no floor.
Then the two placement checks that belong to this room specifically. Gear security: whatever is visible from the window is what every passerby sees, so the screen and the console sit where the window does not advertise them. Noise: the speakers do not live on the fence line, because the fence line is where the neighbors are.
Before ordering furniture, set the pieces out in the arrangement and use it. Sit down with the door both open and shut, walk the route from door to couch with a drink in your hand, and keep the layout that leaves the route you actually need. Then mark that arrangement and order the furniture.